Turning Art Into A Business And A Watercolour Tutorial With The Lovely Drawer
We invited Teri from The Lovely Drawer - one of our Zoella X Etsy makers - to tell us all about how she made her art into a business. You'll also find a step by step for creating a beautiful citrus print with watercolours.
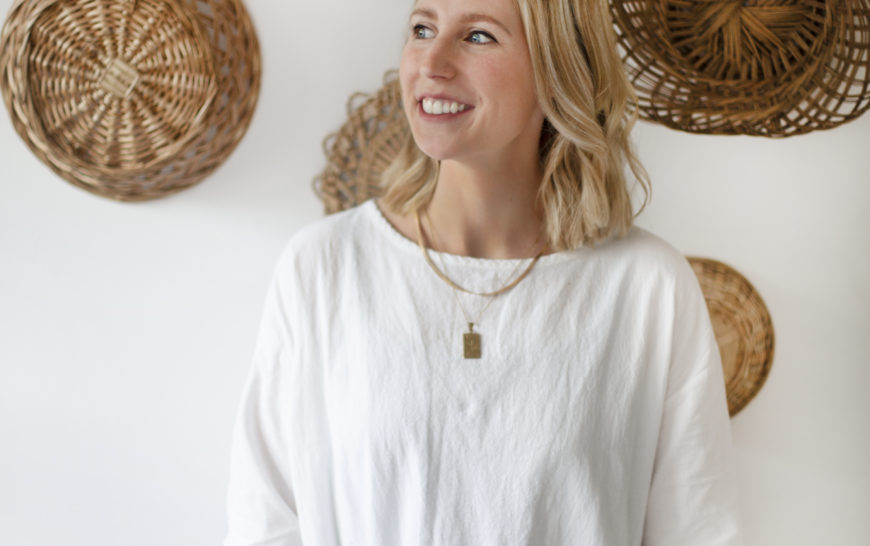
Hi my name is Teri and I’m the name and face behind The Lovely Drawer. I’ve been creating art since my little fingers could hold a colouring pencil and very early on there wasn’t any doubt that my future career would only exist within the realm of art and design.
By the time I was applying for uni courses I was weighing up fashion or graphic designTeri – The Lovely Drawer
I opted for a BTEC diploma in Art and Design at college which is where I tried a whole host of disciplines which I loved as I was a big fan of mixed media back then. By the time I was applying for uni courses I was weighing up fashion or graphic design but was advised by my teacher to look into printed textiles and surface pattern design which would give me the opportunity to really use my drawing skills.

I studied at Leeds College of Art and very quickly found myself caught between pursuing design for kids and babywear or design for paper and stationery. My final major project was a mix of the two and after lots of interest at New Designers Exhibition post-graduation, I was excited to see where those leads took me.
I really didn’t feel capable of running my own business straight out of UniTeri – The Lovely Drawer
The only problem was that I graduated when the credit crunch hit in full force. Less than ideal! Lots of my course friends decided to pursue freelance careers as employment dried up but I really didn’t feel capable of running my own business straight out of Uni so I spent months doing work placements at various different greetings card and stationery companies, whilst building up my portfolio and I finally got a job in London, six months after leaving uni.
To begin with, I couldn’t believe I was getting paid to design greetings cards for a living but over time I was more and more limited in how creative I could be in my work and needed a separate outlet for that side of me. Cue: The Lovely Drawer. It began as a very simple blog, a place to document the little creative projects I did whether that was design, styling, decor or recipes and before I knew it I was getting design commissions.

I loved the freedom I had when working on these other projects and soon I started to wonder about going freelance full time, the very thing I said I would never do. After a very stressful year of attempting to do my side hustle alongside a full-time job, I quit my 9-5. After 5 years working there, it felt like an enormous leap but I was really excited to run The Lovely Drawer full time and see where it might go.
I threw myself into any creative opportunity in order to get my name out thereTeri – The Lovely Drawer
I spent the first year creating a collection to start an Etsy shop and working on a varied amount of collaborations for which I was definitely underpaid but I threw myself into any creative opportunity in order to get my name out there. I started using Instagram to show my process and behind the scenes when I was designing or styling and shared what I was learning on my blog too.
I really didn’t have a clue what I was doing so there were a lot of mistakes and figuring things out as I went along. I established some creative pals from various meetup events that gave me some peers to get advice from or just to talk to whilst adjusting to working by myself.

Over the years my blog and Instagram accounts took on a life of their own which feature heavily in my business now but I’ve never stopped creating art. I love that I’m now established enough that I have a steady stream of orders that come via my own online shop.
I still can’t really believe people buy my work to have in their homes or give as gifts and it feels really surreal when I’m sending orders to Australia, Hong Kong or the US. I love that I have the freedom to design new products that I’m excited about and don’t need to run them past a number of other people before getting sign off. Alongside all of this, I’ve also been running brush lettering workshops for a number of years now which was another thing I never saw myself doing but I love teaching people a skill they’ve never explored and inspiring people to be creative away from a computer is so worth it!

My process has never really changed in that I get most of my ideas from walking around my area, in nature or quite often my inspiration for artwork comes from how I’m currently inspired by interiors. I love muted colours, textures and hand-drawn lines and I can’t bring myself to ever design something on the computer from scratch!
All of my art prints are printed on-demand from my studio printerTeri – The Lovely Drawer
All of my work starts on a piece of paper where I paint or draw a number of elements and backgrounds, which I then scan and place together on Photoshop. I’ll edit and brighten colours and play around with layouts until I’m happy with the final look but my aim is always that the hand-painted feel wouldn’t be lost. I get some products printed externally but all of my art prints are printed on-demand from my studio printer so I will run some trials to make sure the colours look as they do on screen before I finish an art print. I’m super fussy about colour!

I’ve had my own designated studio space in our home for 3 years now and it makes working from home so much more enjoyable although my husband has inherited that desk during lockdown whilst I’m back to my roots on the dining room table. One day I’ll be reunited with my desk but for now, I’m at least thankful to have all my many materials stored away neatly in my studio, rather than falling out of kitchen cupboards and poking out from underneath the bed!

To create this citrus piece you’ll need…
- Watercolour palette
- Round tip paintbrush
- Jar of water
- White acrylic paint
- Sheet of smooth white cartridge paper
Tip: When using watercolour you should incorporate water into the mixing process. Use the brush to add water to the colours, when combining on the palette tray as this will help them combine and go further on the page. Too much water and the colour will be almost transparent and will run. You’re after a consistency that creates a reasonably solid colour.
Step 1
Start with a pale washed background but make sure the wash isn’t too wet to avoid a rippled page. This was a mix of yellow, red and white. Paint a rectangle but don’t worry about making the edges too straight and refined as it’s nicer to create a more relaxed feel.

Step 2
Once completely dry, use a pencil to gently outline the lemon illustration over the top. If you need to change anything or lighten a line then a you should be able to gently rub the pencil out.

Step 3
Start with the base colour for the lemons. Paint this into the outlined space, tracing the edges and then filling in the middle. This colour was made with a mix of bright yellow, ochre and a tiny bit of red.

Step 4
Once dry, mix a slightly darker shade of yellow by adding in a little dark brown. Choose a side for the shadows and make sure this is consistent throughout the whole design. Paint the slightly darker yellow shade along one side of the lemons and drag the brush into the middle as you go down the shape. Add a little water on your brush if you feel it needs more blending.

Step 5
Then deepen the colour again by adding a little more red and brown and trace down the shadow side of each lemon, adding some smaller brushstrokes for texture.

Step 6
Then mix a deep green colour by combining dark green with a little ochre, blue and brown. Fill in the outlines exactly as you did with the first layer of the lemons.

Step 7
Once dry, add some more blue and brown to the green colour you mixed and with your brush trace down the shadow side of each leaf and adding some smaller brush strokes down the middle too.

Step 8
Once dry you can add some highlights on the opposing side to the shadows with acrylic white paint. Dry brush the white down each side and draw the brush strokes in to the middle slightly for texture.

Step 9
Use the same technique to create white highlights on the leaves.