Tis’ the season of the cheeseboard, falalalala, lalalalaa. To be honest, a cheeseboard goes hand in hand with any season and for some, is preferred over a dessert after a meal. I also think a cheeseboard is a sure-fire way to ensure everybody has something they can nibble on if you’re doing a last-minute get together with friends and drinks. For those of us who don’t really cook much (ahem) it is also SO incredibly easy as it requires no chef capabilities in the slightest. Here’s my little run down of how to achieve the most epic of cheeseboards.

Cheeses
Obviously the key ingredient to any cheese board is the cheese itself. Depending on how many guests you are planning to serve the board to (and how hungry they might be), you generally want around 5-6 key cheeses minimum. But what kind of cheeses do you need in order to tick all the cheeseboard boxes?
Strength – You want to try and get a good selection of different strength cheeses. Some people will want something with a bit of a kick, or that’s been maturing for as old as you are, and others will want something a little lighter in taste. A blue cheese is a good default for a bit of strength and a brie is also a good milder choice (always buy more of the brie, it’s usually the cheese most people eat more of)
Textures – It’s also worth thinking about different textures of cheeses too. You should have some harder cheeses like cheddar, jarlsberg and manchego and then softer or more crumbly options like a goats cheese or camembert.
Flavours – I also think it’s nice to add a few cheeses that have different flavours. You could add something with a bit of spice, or a touch of smoky flavouring. A hit in our household is a truffle cheese, or something with a hint of garlic! We even tried one recently with a sweet taste as it had toffee pieces in it (not sure it went down entirely well, but always fun to try!)
Origin – Sometimes it might be nice to try particular cheeses from certain countries. You could do a fully French cheese board, a Greek board, Italian or an “around the world” cheeseboard where you sample cheeses from various different countries (could even make a game out of it if you wanted, where people have to guess). A few mega cheese enthusiasts will always have a favourite country that their cheese is made and produced in, and if you are buying your cheese from a super enthusiastic cheesemonger as opposed to your local supermarket shelves, you will definitely get a better idea of which cheeses are most popular and from which countries.

My Go-To Cheeses:
(list is for a larger gathering, cheeses in bold are musts for smaller groups):
- Brie (and lot’s of it)
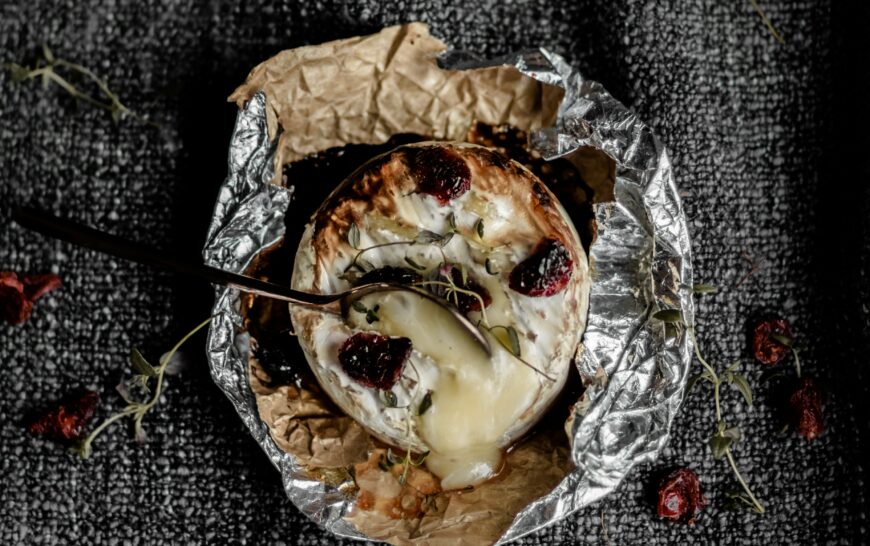
- A melted camembert baked in the oven
- Stilton or gorgonzola
- Cambezola
- Smoked Applewood
- Cheddar (Snowdonia black bomber is a fave)
- Goats Cheese
- Flavoured Cheese (a couple if you have a larger group)
- Comte

Crackers and Biscuits
You can’t have cheese without crackers, or something which you can spread on to your heart’s content. As a child who was not really into cheese, the crackers were always my main focus. Did I feel like a more wheaty biscuit like the digestive, or was I after something much thinner with a crunch like a water biscuit? Much like the cheese, you want to have a nice little selection so people can choose what they think might complement their cheese of choice. I also like to add breadsticks and little cheesy biscuits (maybe that’s still the child in me finding those things a great pop in the mouth snack). I also think it’s quite nice to add a small thin loaf of some sort, maybe with olives or a bit of flavour. These days there are so many different crackers and biscuits on offer, beetroot, charcoal, cheese, spicy, wholemeal, herby, seedy and of course, your classic plain varieties. As long as you have a nice selection of a few of those, I think people will be super happy.


Chutneys and Jams
Another very important aspect of any cheese board, is a nice chutney or jam of some kind. The classic is of course pickled onion chutney, but there are so many incredible flavours out there that would make anyone happy to pair with a slice of cheese on a cracker. A few favourites we add are a balsamic fig, or a sweet chilli jam. You also might want to add a bit of quince as this is known as a great accompaniment to a cheeseboard.

Complementary Additions
Depending on who you have as guests and what you think they might be more into, here are a selection of complementary additions to any cheeseboard. It’s important to have some of these to break up the board and offer a bit of palette cleansing, or they simply just go bloomin’ well with cheese! I like to add hams and olives, which some may say make it a little more on the charcuterie side, but it’s just something that always goes down very well in our house. Along with honeycomb which is a fairly new addition to my cheeseboards but is so delicious with the softer cheeses like brie. My mum, on the other hand, likes a bit more of a crudité style and will add celery, apple, grapes and walnuts to her cheese boards.
- Red and white grapes (you can also freeze these so they are like little sorbets)
- Celery
- Walnuts
- Honeycomb
- Fresh Figs
- Rosemary
- Apple Slices
- Olives
- Sliced hams
- Cornichon pickles
- Pickled onions
- Oil & Balsamic dip
- Salted Butter

Arranging
Now for the fun part, putting it all together to display for your guests. Opt for a slightly larger cheeseboard than you may think, once you start adding everything else around your cheese, it tends to fill up quite quickly. Go big or go home tends to be how I do a cheese board, and it never disappoints.
It’s important to get any cheeses out of the fridge 1- 2 hours prior to serving as some will require being at room temperature to be at their best a little sooner than the other cheeses, so I’ll usually pop these on the cheese board first. You should also pop any baked, or cheese you want to serve melted into the oven to start heating as you start prepping the board.
The first step is laying out the cheese! Some people like to display their cheeses in strength order, allowing people to start mild, and work their way up to the stronger cheese, which then means your palette isn’t ruined with the first taste of a strong chilli cheese, making the brie seem a bit tasteless in comparison afterwards. I tend to spread the cheeses around the board evenly (but in no particular order, I feel like most people I know are aware of the cheeses set out in front of them, so naturally navigate their way around themselves). If your guests don’t know the cheeses, it’s nice at this stage to add little tags or labels alongside a knife for each cheese. You don’t want someone who used the knife in the blue cheeses, to then slice into a brie for the next person to get a hybrid of the two. Make sure each cheese has already had a knife put into it, or already sliced open in some way, as this encourages people to get stuck in. I find sometimes if a cheese looks a bit untouched and perfect, people are less likely to cut into it.
I then start putting the chutneys, jams and salted butter on the board, and I spoon these into small round dishes and pop individual spoons in each. Once you have your cheeses and chutneys laid out, it’s time to start on a few of the larger accompaniments like a few bunches of grapes, honeycomb, olives and hams (which I fold into little pieces so they don’t take up as much room). By this point, the board is starting to look a little more full, so I’ll add crackers in rows filling up the gaps around the board so they are nicely spread around. The key is not being able to see the board, so once you feel happy with your breadsticks, crackers and bread, it’s time to go back to the accompaniment list. I fill gaps with walnuts, pickled onions and fresh figs and then add a couple of sprigs of rosemary if I’m feeling particularly bougie. Now your board is ready to serve! Make sure you give everyone their own small side plate and a knife for spreading (you don’t want them using the cheese knives or they’ll never go back on the board for others to use), serve with a tipple and sit back and enjoy as your cheeseboard gets lovingly destroyed in the best possible way.